The first step in roof repair is determining whether the damage warrants a temporary fix or a professional replacement. Choosing the right solution saves homeowners money, stress, and worry in the long run.
Small leaks in a single section or worn-out shingles can often be addressed by a simple repair. However, extensive damage and sagging areas require a replacement. Click Here to learn more.
The roof protects your home from harsh weather, pesky critters, and structural damage. But it can’t do its job if the underlying structure and shingles are damaged. That’s why a professional inspection is critical to maintain your roof’s longevity. Inspectors can identify and repair a number of issues before they become a bigger problem, saving you money in the long run.
During the inspection, the inspector will examine all aspects of your roof, including the interior attic space. This is where water stains and mold can indicate leaks and structural damage. Inspectors will also look for rotting wood and gaps in rafters or beams that could lead to pest intrusion.
Inspecting the Roof Surface
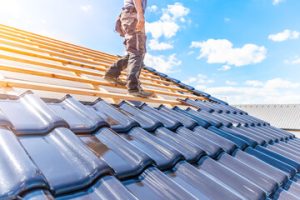
Depending on your roof’s design, you may need to access the roof surface manually or use technology like drones and infrared cameras. Infrared and drones are more expensive than manual inspection, but they provide better details and can detect issues that the naked eye might miss.
An inspector will start the examination at the edges of the roof, looking for cracks, deteriorating shingles or flashing, and loose components. They will then work their way toward the center of the roof, as this is where leaks usually start. The inspector will also check the gutter system, soffits, and fascia to make sure they’re in good condition and free of damage or rot. Inspectors will also examine areas around roof penetrations, such as vents, chimneys, and skylights, to ensure that the seals are intact.
In addition to visual examinations, the inspector will also test for sagging or uneven planes, which might indicate structural problems. They’ll also look for moss, mildew, and mold, which can damage shingles and underlayment. Finally, the inspector will check that your attic and roof have adequate ventilation to prevent moisture buildup and rot.
The level of damage will determine whether it’s more cost-effective to repair the problem or replace it entirely. Small, localized problems like a single leak or a few missing shingles can often be repaired with a roof repair, which is less costly and less labor-intensive than replacing the entire roof. However, extensive damage to the underlying structure or a wide spread of leaks might require a replacement, which is more expensive and disruptive.
Clean the Area
A thorough inspection and subsequent cleanup are vital components of any roof repair project. Thorough cleaning helps eliminate any dirt, debris, or fungus that could contribute to future problems and ensures that adhesives, sealants, and patching materials adhere well. It’s important to clean carefully to prevent causing damage to delicate areas, including shingles and seams.
Start by conducting a visual inspection of the damaged area, noting any visible cracks, blisters, or other defects. Then, use a moisture meter to locate hidden water in the roofing layers and underlying structure. Finally, examine the flashing around vents and chimneys to assess the condition of the protective metal seal.
If the damaged area is extensive, it may be necessary to remove it entirely before repairing it. This is particularly true for deep cracks, large tears, or severe blistering. Carefully cut away the damaged section, being careful not to damage surrounding material or structural components. For smaller patches, a heavy-duty tarp can provide immediate relief and buy you time to schedule a professional repair.
Once the roof is cleaned, it’s a good idea to conduct another inspection to ensure all areas of damage have been addressed. Look for obvious holes or cracks, and check the edges of the membrane to see if any are peeling. You should also inspect for any loose or missing fasteners, especially along the perimeter of the roof.
If you spot a leak, it’s essential to take immediate action. To help manage the problem until you can get a permanent solution, try to redirect water flow from the affected area. You can do this by creating a temporary slope or by redirecting water to a drain. Make sure that the slope is effective in directing water away from the damaged area, and monitor the situation to be sure it continues working properly. Alternatively, you can apply a coating of acrylic sealant to the affected area, which will create a waterproof barrier that dries quickly. It’s not as durable as a permanent fix, but it can help keep the water out until you can schedule professional repairs.
Prepare the Damaged Section
If you notice roof edge damage, it is important to act quickly. Small holes in the roof can quickly deteriorate and allow moisture into your home, leading to costly repairs or even structural issues. It is also important to assess the scope of the damage to determine if a repair or replacement is the appropriate solution. Ultimately, the severity of the problem and the age of your roof will determine whether repair or replacement is the right choice for you.
Conduct a visual inspection of the affected area, taking note of any cracks or holes. Look for rotting fascia boards, weakened or compromised eaves, or any other signs of deterioration or water infiltration. You should also check for loose or missing shingles, which can lead to further damage to the roofing system. You should also inspect the flashing around chimneys, vents, and skylights for damage or a lack of a tight seal.
Clean the damaged area to remove any dirt, debris, or residue that may prevent adhesives from bonding effectively. You should also ensure the damaged surface is dry before applying any materials to the roof.
Use a ladder or a roof-accessible platform to complete the repair. If possible, avoid carrying out repairs in rain or high winds, as this can cause further damage to the roofing system and reduce the effectiveness of the materials used. If you are unsure of your safety on the roof, it is best to hire a professional roofer.
Prepare a tarp or other temporary covering for the affected area, making sure it is large enough to fully cover the damaged section and extend past it. Secure the tarp with nails and screws, and be sure to protect surrounding areas of the roof with 2×4 boards as needed.
To prepare the patch, cut a piece of rubber patch material or tape that is larger than the hole, ensuring at least a 2-inch overlap on all sides to prevent leaks. Once the patch is in place, roll over it with a seam roller to eliminate any air bubbles that could weaken the adhesive and create a watertight seal.
Patching
When a hole in the roof is repaired using a patch, it creates a watertight seal that prevents leaks and other damage to the roofing structure. The patch is made from a material that matches the existing shingles on the roof, providing a seamless appearance.
The first step in making a patch is to determine the extent of the damage, which may be difficult without accessing the roof. Look for signs of leaking on the ceiling or walls inside the home, and inspect the surrounding area for mold, mildew, or other stains. If the damage is extensive, it may be more efficient to hire a professional roofer to address it.
A temporary patch is a good way to reduce the risk of leaking or further damage until more permanent solutions can be implemented. The patch must be compatible with the roof membrane and adhered or welded well to ensure a watertight seal. Choosing the right materials is important, as well as following all safety precautions when working on the roof.
To make a temporary patch, take a roll of polyurethane felt from a local roofing store and cut it to the precise size of the damaged area. Use a putty knife to remove any loose or damaged shingles and clean the area. Apply a bead of roofing cement around the nail heads and shingle edges to ensure a secure bond.
Once the patch is in place, cover it with a piece of aluminum flashing, matching the color and type to the existing shingles. Ensure the flashing extends past the edge of the patch by about 2 inches, and nail it in place with roofing nails or screws. Apply a second coat of roofing cement to the nail heads and shingle edges to further enhance the watertight seal.
Keeping the gutters clean and trimming overhanging branches are other ways to help protect a roof and avoid damage and leaks. Regular inspections and maintenance are also essential to prevent the need for repairs or replacement. When the roof reaches or exceeds its expected service life, or when the cost of repair work begins to exceed the value of the house, replacement may be necessary.